
Reading
Like I said, all things pumpkin and Halloweenie. The few exceptions you'll see that are non-Halloween activities actually took place the week before last. I didn't take as many pictures last week, and with the way I've been updating the blog lately, I figured combining the two weeks would be fine.
We focused on sentences this last week and parts of speech. It was kind of a glossing over of all of that since there were several fun things I found incorporating them into a Halloween lesson.
 |
| Sawyer doing a sight word building activity on the pocket chart. The letters of the words are jumbled up and he had to rearrange them to spell his sight words. Hayden had the same activity with his words as well. This came from the You Can Read blog that I've been pulling ideas from lately. |
 |
| Learning about adjectives: the boys came up with words to describe their pumpkins. I wrote the words describing the outside of the pumpkin in blue and the inside of the pumpkin in white. This idea came from The First Grade Parade blog. |
 |
| Halloween ABC order activity. Hayden had to write his words in the correct order. |
 |
| Sawyer had to cut his words out and glue them in the correct order. |
 |
| Halloween Noun Sort activity. This activity was a freebie that I found on TeachersPayTeachers.com. It came from the blog, Teaching is My Game. It was a fun, cute activity, but I thought it strange that she made "animals" into a fourth category of nouns rather than just label them as "things". |
 |
| Same activity with Sawyer working on his scissor skills. Lots of squares to cut out on this one! |
 |
| Pumpkin Punctuation. The boys had to unscramble the sentences and put the correct punctuation at the end. Hayden did pretty well on this one. I thought it was going to be too difficult, but they surprised me! |
 |
| Finished product. There were two sentences we didn't use only because I didn't have the room on my pocket chart, and we were ready to move on anyway. |
 |
| Books we read this week: A Creepy Countdown by Charlotte Huck Boo, Bunny! by Kathryn O. Galbraith Bedtime at the Swamp by Kristyn Crow The Teeny Tiny Ghost and the Monster by Kay Winters The Fierce Yellow Pumpkin by Margaret Wise Brown (author of Goodnight Moon) Halloween by Harry Behn Happy Halloween, Stinky Face by Lisa McCourt |
We didn't do a lot of writing this week. Most of our activities this week were done orally. However, we did do a a few journal entries (pumpkin oriented, of course):
 |
| Okay, so this isn't pumpkin journal writing, but it's the only picture I have of Hayden doing writing from last week. |
 |
| Drawing a picture for his PUMPKIN acrostic poem. We used the adjectives from our chalkboard activity in reading to make this poem. |
 |
| Hayden's acrostic poem. He obviously didn't finish since he couldn't figure out a word for the first 'P'. But at least I got him writing the rest! |
 |
| Sawyer's Halloween story. He dictated, and I wrote the story. |
 |
| Hayden's friendly letter to his pumpkin that he carved. Again, we used the adjectives on the chalkboard for this activity. He had to pick two of them and write a simile for each one. I refused to help him spell any of the words, especially the ones that were already written up on the board. He had to sound out the ones he didn't know. What it says: "Dear Mr. Pumpkin, You are as orange as my Halloween shirt. You are as seedy as a sunflower. Happy Halloween." |
Math
With the exception of the first two pictures, all our math revolved around our pumpkins. Most of this stuff we did last year as well, but it's so much fun, we'll probably do it again next year as well!
 |
| Making rectangles with tiles and learning the commutative property (i.e. 5+1=6 and 1+5=6) |
 |
| Patterning with tiles (ABAB, ABBABB, ABCABC, etc). Hayden was also introduced to the thousands this day as well. |
 |
| Estimating and measuring the circumference of our pumpkins. |
 |
| Weighing our pumpkins. We also weighed ourselves and figured out how many of our pumpkins it would take to equal our own body weight. |
 |
| The gutting of the pumpkins to get out the seeds. Ironically, both boys were a little squeamish about this part (still!). They're boys for crying out loud!! |
 |
| Counting out the seeds (we decided to go with just one pumpkin on this activity rather than both because there were SO many seeds). We grouped the seeds by 10s and then counted them out. This pumpkin had 410 seeds! |
 |
| Pumpkin Number Scavenger Hunt. Both boys had 12 pumpkins to find. Sawyer's pumpkins had one number written on it, and he had to tell me what that number was. |
 |
| Hayden's pumpkins had an equation written on each one, and he had to tell me what the answer to each problem was. |
 |
| Sorting and counting out our Halloween candy from trick-or-treating. Man! They scored a lot of candy!!! |
 |
| Hayden made a graph with a little help. That tall orange stripe in the middle is all the hard candy and bubble gum (it figures - the candy I don't let them eat!) |
Science
Science was fun! We did a sink or float activity, and we also learned about the life cycle of a pumpkin.
 |
| Sink or Float? They've done this before, but wanted to do it again anyway. |
 |
| Sequencing activity with the pumpkin life cycle. I wrote the stages of the life cycle onto sentence strips and the boys had to match the pictures with each one. Got this activity from The First Grade Parade as well. |
 |
| I found a video on the life cycle of the pumpkin that I had the boys watch after we did our sequencing activity. |
 |
| Then we did a little art project with the stages of the life cycle. Here, Sawyer is coloring each stage. |
 |
| Then, they cut out each section and folded them in half over a piece of yarn in the correct order. |
 |
| After that, we stuffed the yarn between two pumpkins that were stapled together at the bottom to form a pocket. |
Of course we finished up our pumpkin lessons by carving our pumpkins into jack-o-lanterns and roasting the pumpkin seeds. What a fun week!
 |
| Hayden's pumpkin |
 |
| Sawyer's pumpkin |
 |
| The yummy roasted seeds. These did NOT last long at all! |
Ancient Egypt
The focus of Ancient Egypt over the last couple of weeks was pyramids and the process of mummification. The projects that we did were very time consuming, and the days that we did them, that was pretty much the extent of our schooling for the day because it just took up so much time. It was totally worth it!
The first thing that the boys learned was how simple machines were used to move the extremely heavy limestone blocks in order to build the pyramids. We did a little test to see how easy/hard it was to move a heavy object by pushing it with our noses. It was difficult until we added 5 big wooden pencils (simulating logs under a limestone block).
 |
| Hayden gives it a push. |
 |
| Then it's Sawyer's turn. Sparky, the dog, is very interested in what we're doing. |
Then we got down to business. We became archaeologists and got to excavate a model of the Great Pyramid that I ordered from Amazon.com.
 |
| Donning the eye protective gear (chuckle!), Hayden observes our project. |
 |
| After deciphering the hieroglyphics on all four sides, we determined which side would need to be hammer in order to pop the top off. |
 |
| The top is removed and we have a bunch of sand we have to excavate now! |
 |
| These two worked diligently and carefully with the brush, pick, and hammer. Probably the best I've ever seen them work together as a team! |
 |
| They discover a sarcophagus with a mummy inside! |
 |
| Sawyer excitedly digs out more cool stuff. |
 |
| In the end, they uncovered one mummy and four canopic jars. It was a very exciting day! |
Our next big project involved learning about the process of mummification. We spent some time looking through the book, EGYPT In Spectacular Cross-Section by Stephen Biesty to learn about the steps to take in the mummification process, and I also found on the Discovery Kids website, an interactive lesson that was very intriguing to the boys. Afterwards, we did an experiment where we mummified an apple, a project which we found from this blog.
 |
| Using our iPad in the kitchen to assemble the necessary ingredients for the apple mummifying experiment. |
 |
| The apple is cut in half and then in half again. Placed into separate cups, we weigh one of them and find it to be 2 ounces. |
 |
| We covered one of the apple slices with a salt/baking soda mixture. The other apple slice will be our control apple. We have to check back in a week to see what happens. |
Mummifying the apple is supposed to help the boys understand how the natron (salt) draws the moisture out of a body and dries it out. The next day is when we decided to step it up a notch and really go through each of the steps of the mummification process. We found this idea from yet another blog, Living and Learning. We discovered that they used the same book that we had which got me really excited. And when I told the boys we were going to make a mummy, they got excited, too.
First, we needed a body.
 |
| Step 1: Delivery. The family delivers the body and the corpse is measured for the coffin. |
 |
| Step 2: Debraining. We used a paper clip unfolded like a hook to pretend to debrain poor little Barbie and flush her skull out. Step 3: Gutting (we drew a line on the left side of her body where an incision would've been made to remove her organs). |
 |
| Step 4: Washing and Stuffing (we had to pretend this step as well) Step 5: Drying. Here the boys covered the body with salt (natron) to remove all rot-inducing moisture. Then we pretended to wait 40 days before the next step. |
 |
| Step 6: Cleaning and packing. We don't have the Nile River water on hand so we had to improvise with the hose. |
 |
| Sawyer got a little carried away. |
 |
| Step 7: Oiling. The skin had to be rubbed with oils, the nose plugged, and the eye sockets stuffed. We did the oiling part and pretended to do the rest. |
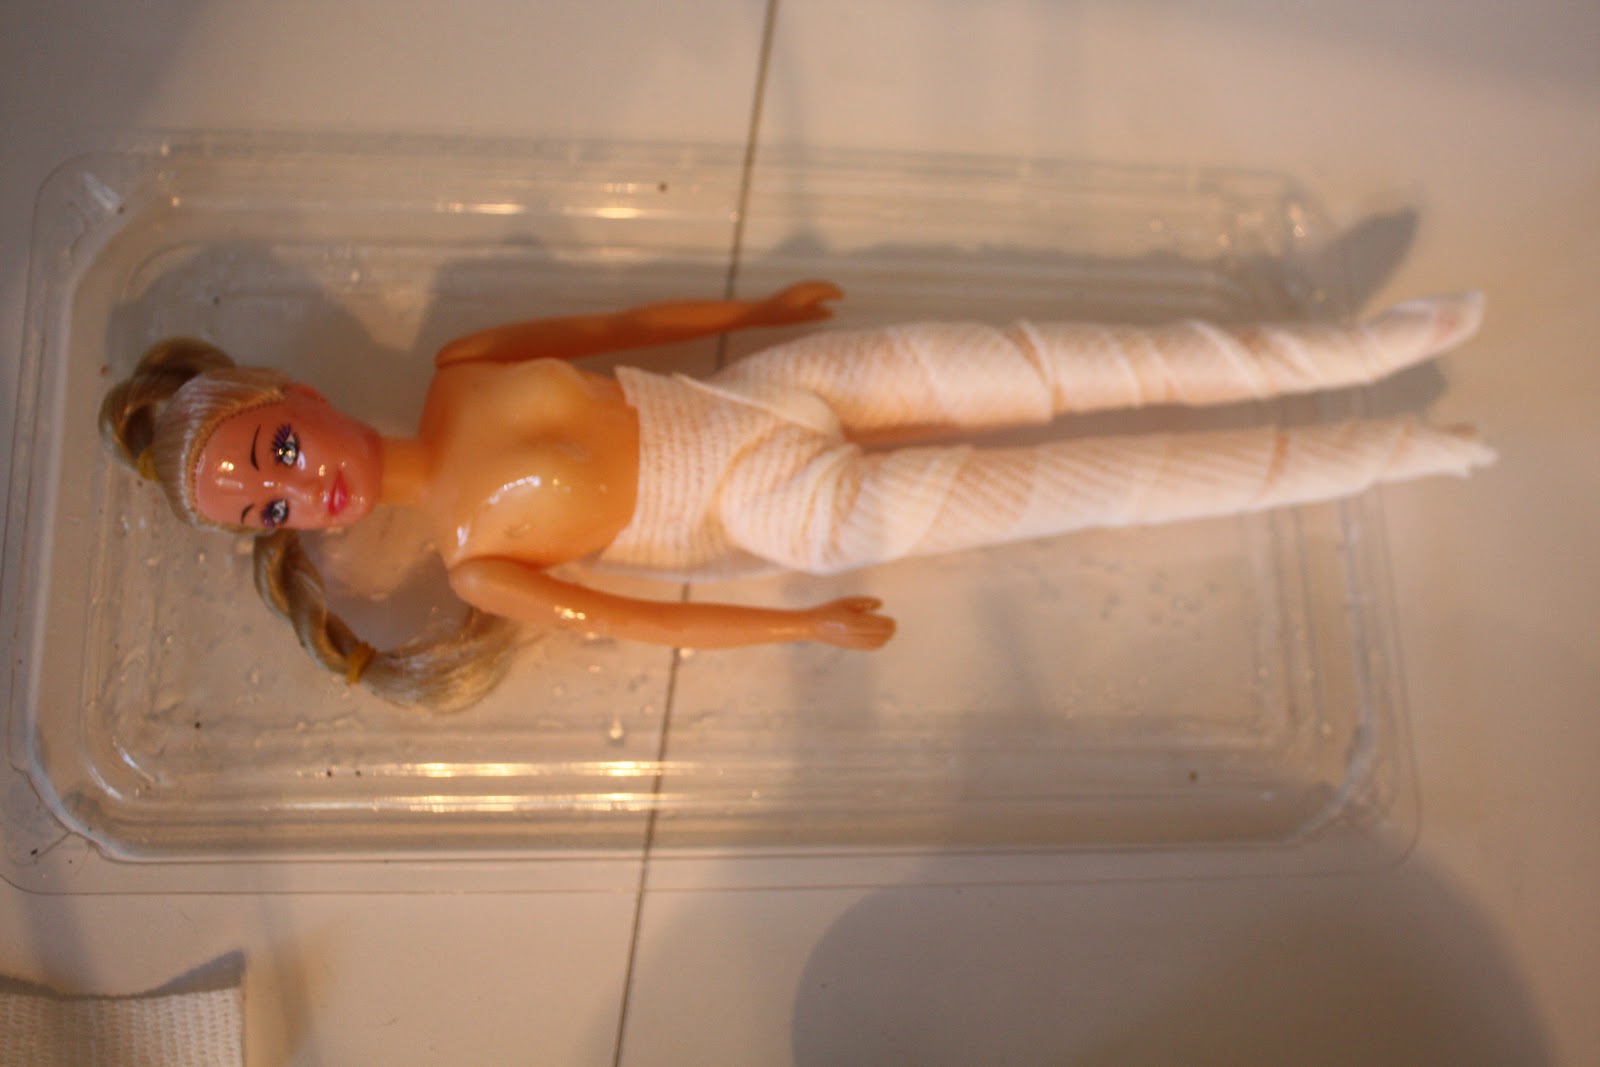 |
| Step 8: Wrapping. This part was too complicated for the boys. So I did it for them and they looked on. |
 |
| Step 9: Protecting. We needed amulets. Hayden found a snake in his reptile toy bin. Seemed like a good enough charm to me. So we went with it. |
 |
| Step 10: Securing. The corpse had to be secured with linen cords. We used colored yarn. To-may-to, to-mah-to. Step 11: Finishing. The corpse needed a painted face mask. I found one online and printed it out big enough to cover her face. We also had to roll up a Book of the Dead on papyrus to go with the body. Since we didn't, we improvised. Hayden wrote his own version of hieroglyphics on a piece of paper and we stuck it under her feet. |
 |
| And of course, to celebrate our awesome mummifying skills, we had Mummy Dogs for dinner that night. (We also had them on Halloween night). |
No comments:
Post a Comment